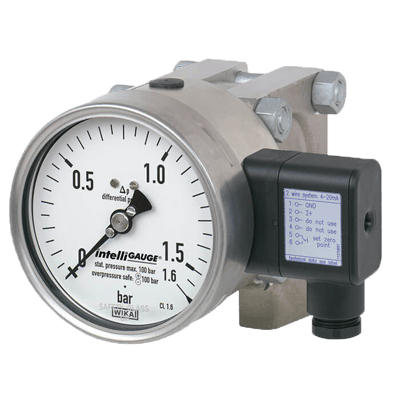
Model DPGT43HP.100, DPGT43HP.160 Differential Pressure Gauge with Output Signal
Description
Wherever the differential pressure must be indicated locally and, at the same time, a signal transmission to the central control or remote centre is desired, the model DPGT43 intelliGAUGE® (patent, property right: e.g. DE 202007019025) can be used.
Features- High working pressure (Static-Pressure) and high overpressure safety, optionally up to 40, 100, 250 or 400 bar.
- Individual, non-linear characteristic curves (e. g. x2 or √x for flow measurement).
- "Plug and play" with no configuration necessary.
- Differential pressure measuring ranges from 0 … 60 mbar.
- Hydraulic cushioning protection against rapid pressure changes.
Specifications
Specifications
Version
- Highest overload safety Either side, Pressure ratings PN 40, 100, 250 or 400, system fill fluid of the measuring cell acts as the dampening of the display
- Overload resistance per EN 837-3.
Nominal Size in mm
- 100
- 160
Accuracy Class
- 1.6
- Option: 1.0 (Application test Required)
- Option: 2.5 (Monel Version)
Instruments with PN 40 & 100
- 0 to 60 mbar to 0 to 160 mbar (Measuring Cell □ 140)
- 0 to 0.25 bar to 0 to 40 bar (Measuring Cell □ 82)
Instruments with PN 250
- 0 to 60 mbar to 0 to 250 mbar (Measuring Cell □ 140)
- 0 to 0.4 bar to 0 to 40 bar (Measuring Cell □ 82)
Instruments with PN 400
- 0 to 0.4 bar to 0 to 40 bar (Measuring Cell □ 86)
- Dimensions of measuring cell from page 7 other units (e.g. psi, kPa) available or all other Equivalent vacuum or combined Pressure and vacuum Ranges
Scale
- Option: Scale layout with individual Non-linear characteristic curves
- Single scale
- Option: Dual scale
Zero Point Setting
- By means of Adjustment appliance
Pressure Limitation
- Observe the recommendations for the use of mechanical Pressure measuring systems in accordance with EN 837-2
- Fluctuating: 0.9 x Full Scale Value
- Steady: Full Scale Value
Overload Safety & Maximum Working Pressure (Static Pressure)
- Either side Max. 40, 100, 250 or 400 bar
Connection Location
- Option: Connection at 12 o‘clock
- Option: Back Mount
- Lower Mount (Radial)
Process Connection
- Differential Process Connection per EN 61518 Other Process Connections via Female or Male threads on Request
- 1/2" NPT Male
- G 1/2 B Male
- G 1/2 B Female
Permissible Temperature
- Option: -40° to +60° C (Silicone oil filling)
- Ambient: -20° to +60° C
- Medium: -20° to +100° C
Temperature Effect
- When the temperature of the measuring system deviates from the reference temperature (+20° C): Max. ± 0.5 %/10 K of Full Scale Value
Case Filling
- Without
- Option: with Case filling
Applications
Applications
- Acquisition and display of processes
- Output signals 4 ... 20 mA, 0 ... 20 mA, 0 ... 10 V for the transmission of process values to the control room
- For measuring locations with a high differential pressure overload and/or high working pressures (static pressures), also in aggressive environments
- Easy-to-read, analogue on-site display needing no external power
